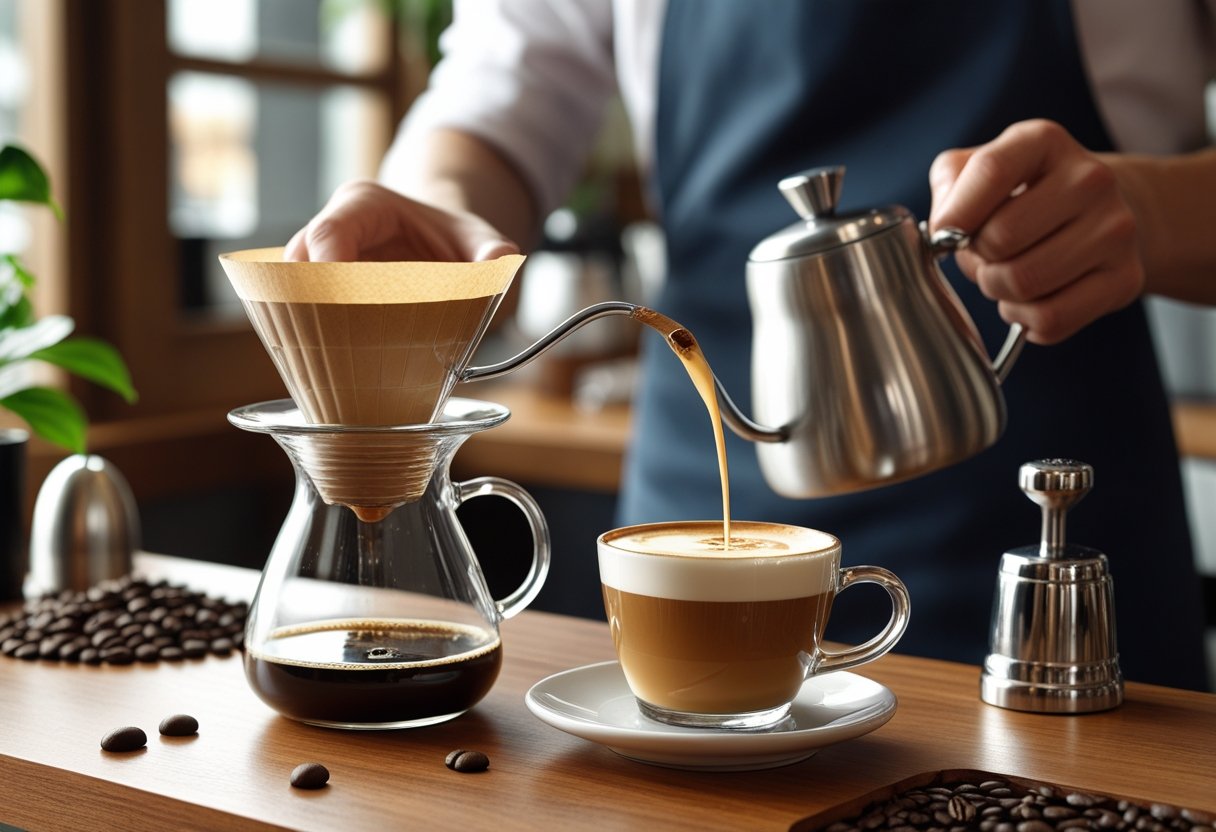

Most coffee lovers think cappuccinos only come from expensive espresso machines. But you can totally make a delicious cappuccino with a pour-over setup, it’s a fun twist on a classic drink.
This method brings together the bold, nuanced flavors of pour-over coffee and the creamy magic of frothed milk.
If you know how to tweak your pour-over technique and froth milk without fancy gadgets, you’re set. You’ll see that making a pour over cappuccino at home needn’t be complicated or expensive.
What Is Pour Over Coffee?
Pour over coffee is all about pouring hot water over ground beans by hand. You get to control the coffee-to-water ratio and how long the water sits with the grounds, which really shapes the taste.
Overview of the Pour Over Technique
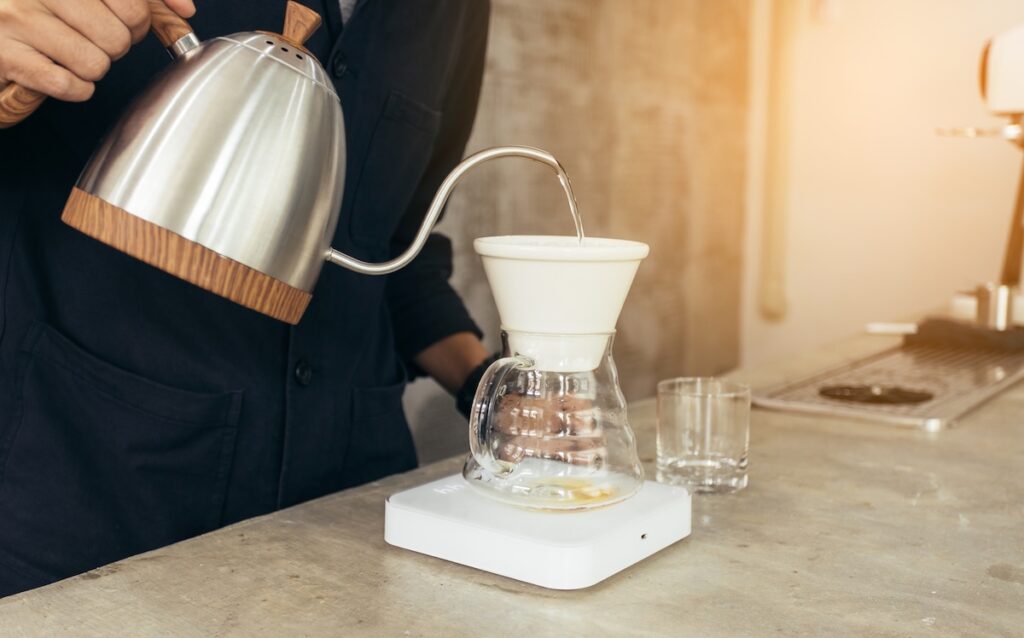
You put ground coffee in a filter, then slowly pour hot water over it. The water drips through the grounds and lands in your cup or carafe.
This all started back in the early 1900s. Melitta Bentz, a German entrepreneur, wanted less gritty coffee, so she made the first pour-over system with a brass pot and some paper.
There are a few things you need to pay attention to:
- Water temperature (195-205°F)
- Grind size (medium to medium-fine)
- Pour speed (nice and steady)
- Brew time (about 3-4 minutes)
First, rinse your filter and add the ground beans. Pour a little water to “bloom” the coffee for 30 seconds, then keep pouring in circles until you hit your target water amount.
Coffee-to-Water Ratio and Extraction
The right coffee-to-water ratio makes a huge difference. Most folks go for a 1:15 to 1:17 ratio, so, 1 gram of coffee for every 15 to 17 grams of water.
Here’s a quick guide:
| Coffee Amount | Water Amount | Ratio |
|---|---|---|
| 20g | 300ml | 1:15 |
| 25g | 400ml | 1:16 |
| 30g | 500ml | 1:17 |
Extraction is just the water pulling flavors out of the grounds. If you get the ratio right, you’ll avoid bitter or dull coffee.
Fresh beans matter a lot. Try to use beans roasted in the last couple of weeks, and grind them just before brewing for the best flavor.
Choosing the Right Coffee Filter
Filters do more than just hold the grounds – they really affect the taste and flow.
Paper filters are the standard. They catch oils and tiny particles for a clean cup. If you use unbleached ones, rinse them first to avoid that papery taste.
Metal filters let more oils through, so your coffee feels heavier and richer. They’re reusable, but you might get a bit of grit.
Cloth filters are right in the middle, they let some oils through, but catch most of the particles.
The shape matters too. Cone-shaped filters fit most pour-over devices, while flat-bottom filters are for specific brewers and change how the coffee extracts.
Always rinse your filter with hot water. It preheats your gear and gets rid of any weird flavors.
Adapting Pour Over for Cappuccino-Making
For cappuccinos, you need a stronger coffee base and careful brewing. That means tweaking your grind, water temp, and ratio so the coffee stands up to milk.
Brew Strength: Mimicking Espresso
Espresso is the classic base for cappuccinos, but you can get close with pour-over if you make it strong enough.
Try a 1:10 to 1:12 ratio instead of the usual 1:16. So, 30 grams of coffee to 300-360 grams of water. That way, the coffee flavor doesn’t get lost when you add milk.
Only brew what you need, about 2 ounces of strong coffee per serving. It’s more concentrated, which is exactly what you want.
Your coffee should taste intense by itself. If it’s bold and a little bitter, you’re on the right track—it’ll shine through the milk.
Grind Size and Water Temperature
Go for a medium-fine grind, a bit finer than your usual pour-over. This helps pull out more flavor quickly.
Keep your water between 195-205°F. Hotter water brings out more oils and flavor, perfect for a cappuccino base.
Pour slowly, and let the finer grind slow down the brew a bit. That extra contact time helps the coffee get nice and strong.
Tips for a Rich Coffee Base
Use dark or medium-dark roast beans. They have richer flavors that stand up to milk. Light roasts just get lost.
Don’t skip the bloom. Use twice as much water as coffee for 30 seconds at the start – it helps the extraction.
Keep your coffee hot while you work on the milk. Pour-over cools down fast, and cold coffee just doesn’t cut it in a cappuccino.
Give your coffee a quick taste before adding milk. If it’s not bold enough, try a finer grind or more coffee next time.
Frothing and Steaming Milk Without an Espresso Machine
You don’t need a fancy steamer to get good milk foam. With basic kitchen tools and a little attention, you can make it work.
Heating Milk on the Stovetop
Pour milk into a small saucepan and heat it over medium-low. Use a thermometer if you have one.
Stop heating at 140°F to 155°F. Go higher and you’ll ruin the milk proteins, which is bad for foam, bad for flavor.
Whole milk makes the best, creamiest foam. Oat milk is a solid non-dairy option and froths pretty well.
Stir gently as it heats. Take it off the stove right at your target temp.
Don’t let the milk boil. Boiled milk tastes weird and won’t foam right.
Using a Milk Frother or Jar
A handheld milk frother is super handy. Stick it just under the surface of the milk and turn it on.
Move it in little circles to whip air in and create that creamy foam.
If you don’t have a frother, try the jar method. Fill a mason jar halfway with hot milk, screw the lid on tight, and shake like crazy for about 45 seconds.
The milk should puff up and double in size. Let it settle for a few seconds before pouring.
Both ways work, but honestly, the frother is easier and more consistent.
Best Practices for Milk Foam
Start with cold, fresh milk. Old milk just doesn’t foam well and falls flat fast.
Use 6-8 ounces per drink so there’s space for the foam to expand. Too much milk is just a mess.
After frothing, tap the container on the counter to pop big bubbles. Swirl it gently for smoother foam.
Pour as soon as you finish frothing. If you wait, the foam breaks down and loses its magic.
Rinse and clean your milk frother right away. Old milk gunk is gross and messes with your foam next time.
Step-by-Step Guide
To make a pour-over cappuccino, brew a strong coffee base and top it with silky milk foam. Fresh beans and the right ratio are key for a bold, satisfying cup.
Preparing and Grinding Coffee Beans
Grab fresh beans, ideally roasted within the last two weeks. Medium to dark roast gives you the best cappuccino flavor.
Grind them to a medium-fine texture, finer than usual pour-over, but not quite espresso-fine. You’ll need about 25-30 grams for a strong cup.
Grind size matters. Too coarse? Weak coffee. Too fine? It’ll taste bitter and harsh.
Burr grinders are best for even grounds, but a blade grinder can work if you’re careful.
Grind right before brewing. Pre-ground coffee just doesn’t taste as lively.
Brewing a Strong Pour Over
Use a 1:12 coffee-to-water ratio, so, 25 grams of coffee to 300 grams of water. That’s stronger than your usual cup, but it’s what you want here.
Heat your water to 200°F. Rinse your filter and set up your dripper.
Add the grounds and make a little well in the center.
Start with the bloom: pour in double the coffee weight in water, wait 30 seconds, and let it bubble.
Pour the rest of the water slowly in circles, keeping the level steady.
The whole brew should take 4-5 minutes. That extra time brings out more depth from the beans.
Frothing and Pouring the Milk
Heat 4-6 ounces of milk to 150°F. Whole milk gives you the best foam, but 2% works if you like it lighter.
Froth with a milk frother, French press, or even a whisk. If you’re using a French press, pump the plunger up and down fast for about half a minute.
The foam should be thick and creamy, holding its shape when you lift the frother out.
Tap the container on the counter to smooth out big bubbles. Give it a gentle swirl for that glossy look.
Good microfoam should look like wet paint – smooth, shiny, and not at all chunky.
Assembling and Serving
Grab a 6-8 ounce cup and pour in your strong pour over coffee. Fill it just about a third of the way, just don’t overdo it.
Next, add the steamed milk. Pour it slowly from a few inches above, maybe 3 or 4, so it really mixes in.
Spoon a generous layer of foam on top. You’re aiming for that classic cappuccino look: equal parts coffee, steamed milk, and foam.
You should see those layers: coffee on the bottom, then milk, then a fluffy cap of foam.
Serve it right away while it’s still piping hot. That’s when the flavors come together best, honestly.
Enjoy!