
Learning how to make cappuccino at home can save you money and give you complete control over your coffee treat of the day.
A good homemade cappuccino combines strong espresso with properly steamed milk to create the signature creamy foam that defines this classic Italian drink.
Let me show you the main techniques for brewing espresso, steaming milk, and combining them to create cafe-quality cappuccinos in your own kitchen.
You’ll learn what equipment works best, how to get the milk texture right, and the key ratios that make the difference between an average cup and an exceptional one.
Whether you’re using a dedicated espresso machine or working with more basic equipment, these tips will help you consistently make cappuccinos that match what you’d find at a good coffee shop. If not better!
Selecting Coffee Beans for Your Cappuccino
The quality of your cappuccino starts with the coffee beans you choose. Understanding the different coffee bean varieties, such as Arabica and Robusta, can help you make an informed decision. We will also cover why freshness plays a crucial role in the flavor of your cappuccino and how to ensure you’re using beans at their peak.
Additionally, we’ll discuss the importance of coffee grind size and how it affects the extraction process. Whether you prefer to buy pre-ground coffee or grind your own, these tips will improve the taste and aroma of your cappuccino.
Understanding Coffee Bean Varieties
Coffee beans come in different varieties, each with its own unique characteristics and flavors. Arabica beans are known for their delicate and nuanced flavors, often exhibiting notes of fruit, chocolate, and nuts. Robusta beans, on the other hand, have a stronger and more bitter taste, making them ideal for adding depth and body to your cappuccino.
Why Freshness Matters in Coffee Beans
When it comes to coffee, freshness is key. The flavor and aroma of coffee beans deteriorate over time, especially after they have been roasted. To ensure the best possible cup of cappuccino, it’s important to use freshly roasted beans.
Look for beans with a roast date printed on the packaging and try to consume them within a few weeks of roasting. If you have the option, consider buying coffee beans from a local roaster or specialty coffee shop, as they often have a higher turnover of beans, ensuring freshness.
The Importance of Coffee Grind Size
The size of your coffee grounds plays a crucial role in the extraction process. For cappuccino, a medium to fine grind is typically recommended. Finer grounds extract more flavor from the beans, resulting in a bolder and more intense cup of coffee.
However, be careful not to grind the beans too fine, as this can lead to over-extraction and a bitter taste. If you’re using a cappuccino machine with a built-in grinder, consult the manufacturer’s guidelines to find the optimal grind setting. Alternatively, if you’re grinding your own beans, aim for a consistency similar to table salt.
Cappuccino Ingredients To Know
A perfect cappuccino requires a few key ingredients that work in harmony to create a balanced and flavorful beverage. Let’s explore each one to understand their role in crafting the perfect cappuccino.
Espresso
At the heart of every cappuccino is a shot of espresso. This concentrated form of coffee is made by forcing hot water through finely ground coffee beans. The rich and robust flavor of espresso provides the base for your cappuccino.
Milk
The second crucial ingredient in a cappuccino is milk. The choice of milk can significantly impact the taste and texture of your drink. Whole milk is commonly used for its creamy and full-bodied flavor, but you can also use alternatives such as oat milk or almond milk. I like coconut milk as an alternative, to me it has the right blend of flavor and thickness. The key is to find a milk that froths well and complements the flavors of your espresso.
Optional Flavorings
To add an extra layer of flavor and personalization to your cappuccino, you can experiment with optional flavorings. Syrups like vanilla or caramel can lend a touch of sweetness, while cocoa powder or cinnamon can add a delightful aroma. Just remember to use these flavorings sparingly so they don’t overpower the natural flavors of the espresso and milk.

Understanding the role of each cappuccino ingredient empowers you to create a drink that is tailored to your taste preferences. Take the time to choose high-quality espresso beans, experiment with different milk options, and consider adding a hint of flavor to elevate your cappuccino experience. With the right ingredients and a little practice, you’ll be on your way to enjoying a delicious and authentic cappuccino in the comfort of your own home.
How to Make A Cappuccino: Step-by-Step
Making a good cappuccino involves a series of steps that contribute to its signature taste and appearance.
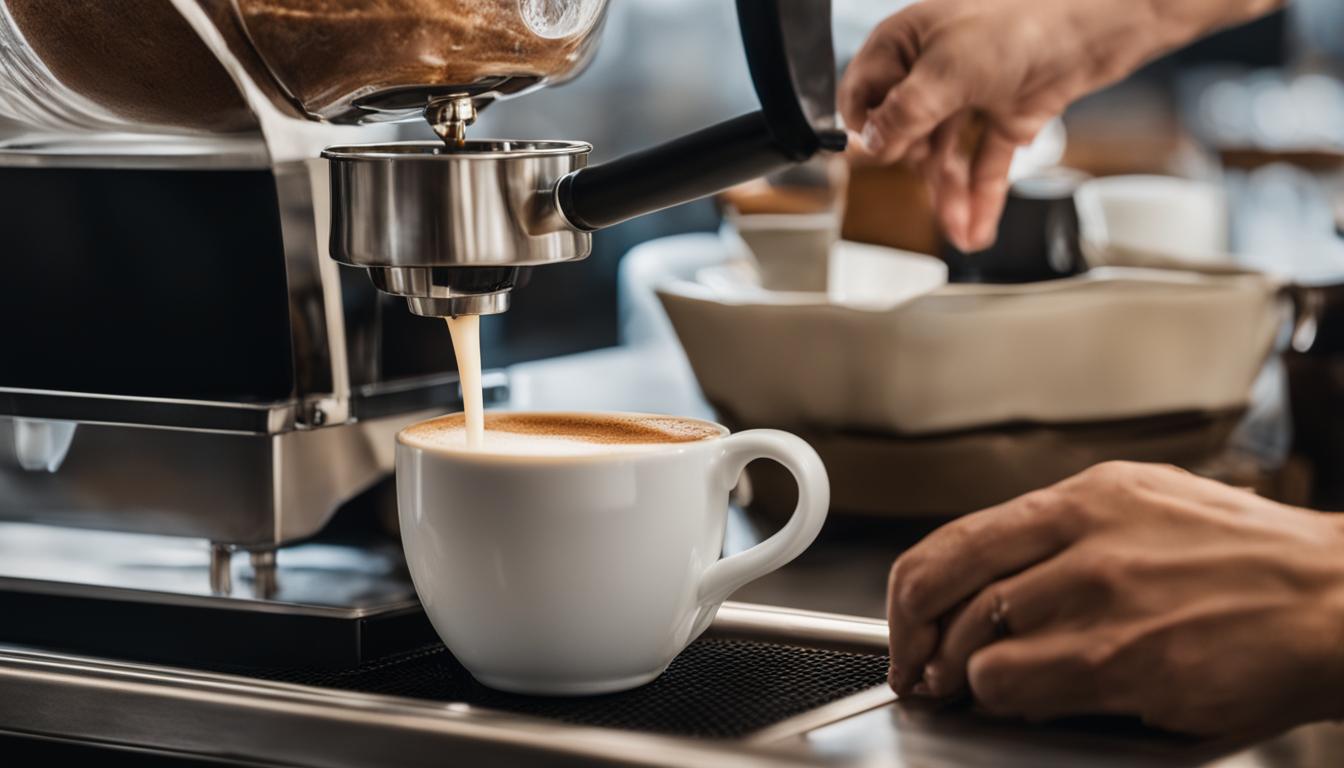
Preparing the Espresso Base
The foundation of a great cappuccino lies in the quality of the espresso. There are various methods for preparing the espresso base, depending on the equipment you have available. Whether you use an espresso machine, a moka pot, or even instant coffee, we will guide you through each technique to ensure you achieve the perfect espresso base for your cappuccino.
Frothing Milk for Cappuccino Perfection
The frothed milk is another essential component of a cappuccino, adding a creamy and velvety texture to the beverage. We will share techniques for frothing milk using different tools, such as a steam wand, handheld frother, or manual frother. We will also discuss the ideal temperature and consistency to aim for, as well as troubleshooting common issues like overheating or air bubbles.
The Right Cappuccino Ratios
Achieving the perfect balance of espresso, milk, and foam is crucial to creating an authentic cappuccino. We’ll provide guidance on the ideal cappuccino ratios, including the proportion of espresso to milk to foam. By carefully measuring and adjusting these ratios, you’ll be able to create a cappuccino with the right intensity, creaminess, and depth of flavor.
Tips for Frothing Milk for Cappuccino
Frothing milk is an essential step in creating a velvety and creamy cappuccino. Whether you use a steam wand, handheld frother, or manual frother, mastering the art of frothing milk will elevate your cappuccino experience. Here are some tips and techniques to help you achieve perfect frothed milk:
- Use cold milk: Cold milk froths better and creates a denser foam. It’s best to use whole milk for a rich and creamy texture.
- Choose the right container: Opt for a stainless steel pitcher or a large, deep mug to allow room for the milk to expand and create foam.
- Position the steam wand: If using a steam wand, position it just below the surface of the milk and at a slight angle to create a whirlpool effect.
- Aim for the right temperature: Froth the milk until it reaches around 150-155°F (65-68°C). This temperature enhances the sweetness of the milk without scalding it.
- Maintain a consistent texture: Create small, fine bubbles by keeping the tip of the steam wand slightly below the surface of the milk. Avoid large, visible bubbles.
- Tap and swirl: After frothing, tap the pitcher on a flat surface to remove any large air bubbles. Then, give it a gentle swirl to incorporate the foam into the milk.
By following these tips, you’ll be able to achieve perfectly frothed milk every time, resulting in a beautifully crafted cappuccino with a rich and creamy foam.

Crafting Cappuccino Foam
The foam on top of a cappuccino not only adds visual appeal but also contributes to its flavor and texture. Creating the perfect foam requires a delicate balance of technique and understanding the science behind it. Ready to explore the art of crafting cappuccino foam, from the proteins and fats in milk to achieving silky smooth textures?
I’ll also give you step-by-step instructions on how to pour and create foam art, transforming your cappuccino into a captivating masterpiece.
The Science Behind Cappuccino Foam
To understand cappuccino foam, we must first comprehend the chemistry behind it. When milk is heated and frothed, the proteins and fats within it interact, creating a stable foam structure. The proteins help stabilize the air bubbles, while the fats add richness and mouthfeel to the foam. By controlling the temperature, steam pressure, and milk composition, you can achieve different foam textures that enhance the overall sensory experience of your cappuccino.
How to Achieve Silky Smooth Foam
Creating silky smooth foam starts with choosing the right milk. Whole milk, with its higher fat content, tends to produce the creamiest and most velvety foam. However, if you prefer a lighter option, you can also experiment with low-fat or non-dairy alternatives. Here’s a step-by-step guide to achieving silky smooth foam:
- Start with cold milk and pour it into a clean, stainless steel milk pitcher.
- Position the steam wand of your espresso machine just below the surface of the milk.
- Turn on the steam and gradually raise the pitcher as the milk expands.
- Continue steaming until the milk reaches a temperature of around 150°F (65°C).
- Tap the pitcher on the countertop and swirl the milk to break up any larger bubbles.
- Pour the foam over your prepared espresso, aiming for a smooth and even distribution.
Remember, practice makes perfect when it comes to achieving the ideal foam texture for your cappuccino. Don’t be afraid to experiment with different steaming techniques and milk types to find the perfect balance for your taste preferences.
Creating Foam Art
Once you’ve mastered the technique of creating silky smooth foam, you can take your cappuccino to the next level by adding foam art. Foam art allows you to express your creativity and add a personal touch to each cup of cappuccino you make. Here are some tips for creating foam art:
- Ensure your foam is the right consistency. It should be thick and creamy, but still pourable.
- Hold your milk pitcher close to the surface of the espresso and pour the foam in a steady, controlled manner.
- Start with simple designs like hearts or rosettas, and gradually progress to more intricate patterns as you become more skilled.
- Use a toothpick or small utensil to manipulate the foam and create additional details in your art.
Remember, creating foam art takes practice and patience. Don’t get discouraged if your first attempts don’t turn out as expected. With time and dedication, you’ll be able to create beautiful foam art that will impress both yourself and others.
Table: Foam Textures
| Foam Texture | Description |
|---|---|
| Dry Foam | Light and airy foam with larger bubbles, resembling a cloud-like texture. |
| Microfoam | Smooth and velvety foam with small, uniform bubbles that evenly coat the espresso. |
| Silk Foam | Rich and creamy foam that lingers on the tongue, providing a luxurious mouthfeel. |
Conclusion
You’ve now mastered the art of making the perfect cappuccino at home. By following the step-by-step guide and utilizing the tips and techniques shared throughout this article, you have all the tools you need to create a barista-worthy cappuccino right in your own kitchen.
Impress your guests with your newfound skills or indulge in a cafe-quality cappuccino whenever the craving strikes. Don’t be afraid to experiment with different coffee beans, milk types, and ratios to find your personal favorite blend. The possibilities are endless.
So go ahead, grab your favorite mug, and get ready to savor the rich aroma and creamy taste of a homemade cappuccino. With a little practice and passion for the art of coffee-making, you’ll be able to enjoy the best cappuccino at home anytime you feel like it.